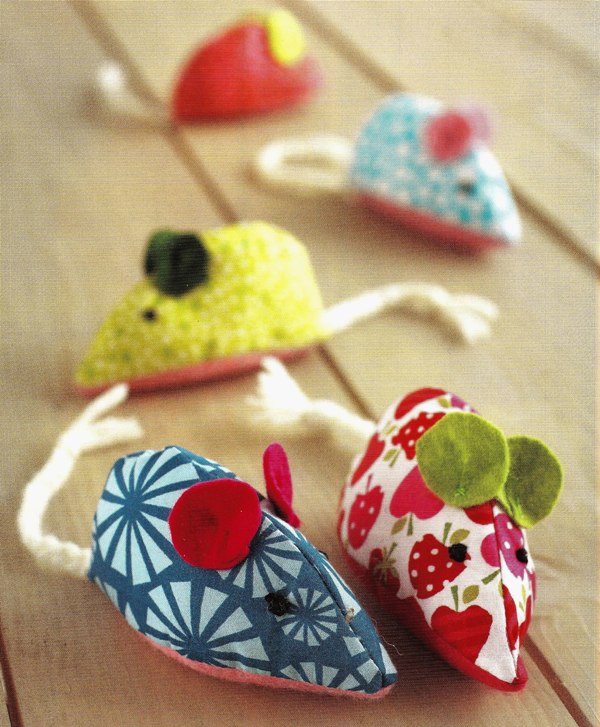
Filled with catnip, this little mouse make a delightful gift that a cat literally cannot resist. This is a great project for using up offcuts and leftover pieces of material. Cotton fabrics work well, but why not also try tweed or leather? Catnip or Nepeta cataria is cultivated as an ornamental plant for use in gardens. It is also grown for its attractant qualities to house cats and butterflies. With domestic cats, catnip is used as a recreational substance for pet cats’ enjoyment, and catnip and catnip-laced products designed for use with domesticated cats are available to consumers. Common behaviors cats display when they sense the bruised leaves or stems of catnip are rubbing on the plant, rolling on the ground, pawing at it, licking it, and chewing it. Material you need
– dressmaker’s scissors, pencil, sewing pins
– sewing machine, sewing needle
– cotton fabric, felt fabric in two different colours, white wool yarn
– wadding, cotton sewing thread, black embroidery thread
– dried catnip (optional)
How to make the catnip mouse
1 Using the template on the bottom of the page, cut out two main body pieces from two pieces of fabric held right sides together. Cut out the base and ears from coloured felt.
2 Cut three lengths of wool to twice as long as you would like the tail to be and knot them together. Knot the short ends around a pencil and make a plait to use for the tail.
3 Pin the body pieces together, right side to right side. Start sewing 8mm (3/8in) in from the bottom edge. Sew around the curve, stopping 8mm (3/8in) from the end.
4 Tie off the ends and trim the excess fabric to make the seam less bulky once the mouse is turned right side out.
5 Pin the felt base to the long sides of the body pieces, so that the right side of each of the pieces is facing the felt base.
6 Starting from the back end (the slightly raised end) of the mouse, stitch all the way around the sides, attaching the top layer to the base, and stopping 2.5cm (1in) before the end.
7 Trim off the excess fabric in the seams and turn the mouse right side out, pushing the nose out with your finger. If necessary, use a needle to pull out the tip from the outside.
8 Push small amounts of wadding into the mouse, ensuring that you fill the nose. When it is half stuffed, add dried catnip. Finish stuffing the catnip mouse.


9 Insert the tail underneath the back seam, pinning the seam closed. Using small stitches, carefully sew up the opening, securing the tail into position.
10 Bring one cut edge of the ear over the other so that the ear curves inward. Pin in place and stitch down, repeating for the other side. Embroider two black eyes onto the catnip mouse.
The post Catnip mouse appeared first on GoldenFingers.


